This article is primarily for Doebank Designs clients, but anyone may find it useful. Here are the steps we recommend for our clients when they need to learn how to write a blog post in WordPress.
Here’s how you get started
If you’ve used WordPress before, you’re probably good to go. But if this is your first time with the platform, here’s what you do:
- Log in to your site. I know…it sounds obvious, but sometimes we forget the basic steps.
- On the lefthand menu, select “Posts,” and then select “Add New.”
Now you’re in the writing space! Let’s get that article started.
Write your headline/title first
When you get to your new post, you’ll be on a nice, clean screen like this:
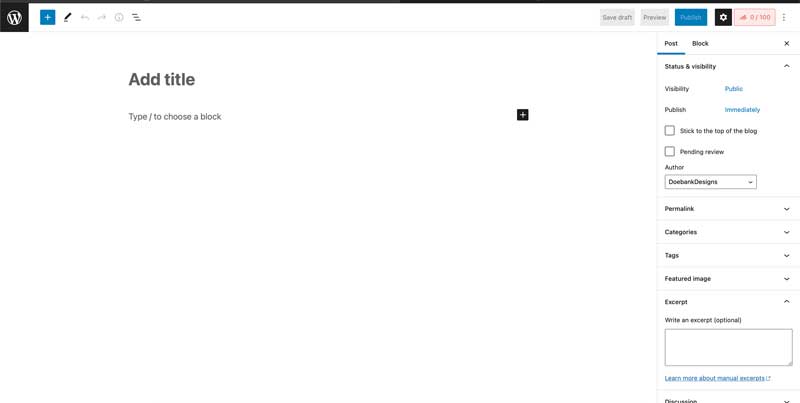
Your first step is to create a compelling headline (a title for your post). Brian Clark over at copyblogger.com says, “Your headline is a promise to readers. Its job is to clearly communicate the benefit you’ll deliver to the reader in exchange for their valuable time.”
Check out Brian’s article on how to write compelling headlines. It’s a valuable resource as you get started with your articles.
So click right where it says, “Add title,” and start typing your title.
Craft your post content
Below the title, where it says, “Type / to choose a block,” you can just start typing away. WordPress will automatically convert some content for you. For example, if you start a new line with a number and a period, it will know to start a numbered list.
If you want to choose from a variety of formatting and layout blocks, click the plus symbol in the top left corner. You’ll be presented with a selection of blocks like this:
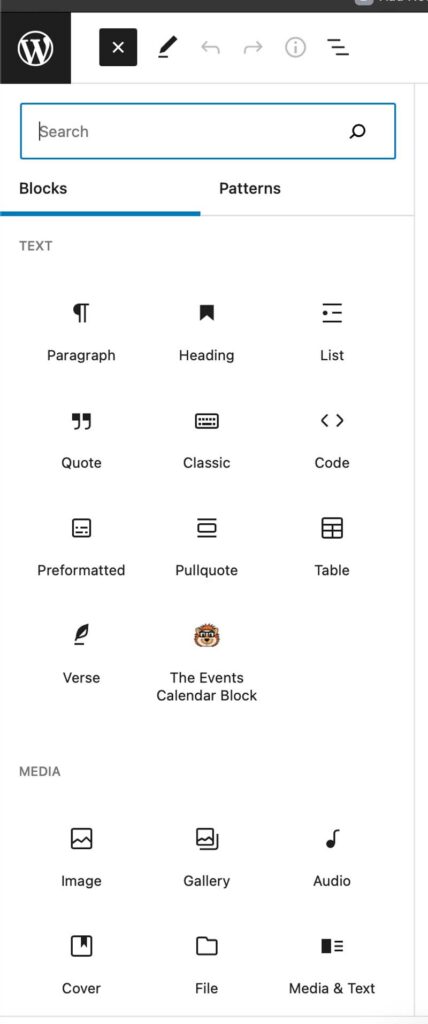
The most important block is your “Heading” block. You’ll want to break your content into bite sized parts and give each part a heading. Headings make your content easier to scan. Most people don’t read blog posts straight through from beginning to end, so your headings are valuable content markers. They also provide search engines with important details about the content of your post.
Set your featured image for your post
Most sites are designed so that each post displays a featured image. The image provides an eye-catching visual representation of your post. It can emotionally draw the reader in and entice them to read what you’ve taken time to write.
Select a compelling image
Start by selecting your featured image.
PLEASE NOTE: Do not, under any circumstance, just Google a topic and then pick an image from the Google results. You will most likely be using someone else’s copyrighted image, and you can get hit with a hefty fine if you do.
The best photos are original photos. But sometimes, you just need a quick stock photo. Two great options we often use for royalty-free stock photos are unsplash.com and pexels.com. Both sites provide photos you can use without worrying about copyright violations. It’s always a good idea to provide credit when possible. Both of these sites provide attribution info when you download a photo. For example:
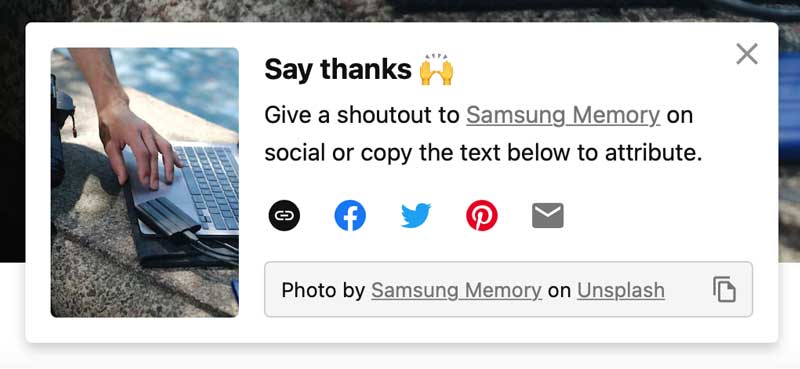
You can add that attribution at the bottom of your post if you’d like.
Resize and compress your image
When you download a stock photo or use a great photo you’ve taken, those photos are often very large. They are much too large for what you’re doing with them on your blog post, so you’ll need to resize them and compress them so that they don’t bog down your website. Here’s how to do that.
Go to https://compressimage.io. Click the little settings icon and set your width to 800px and your quality to 50%:
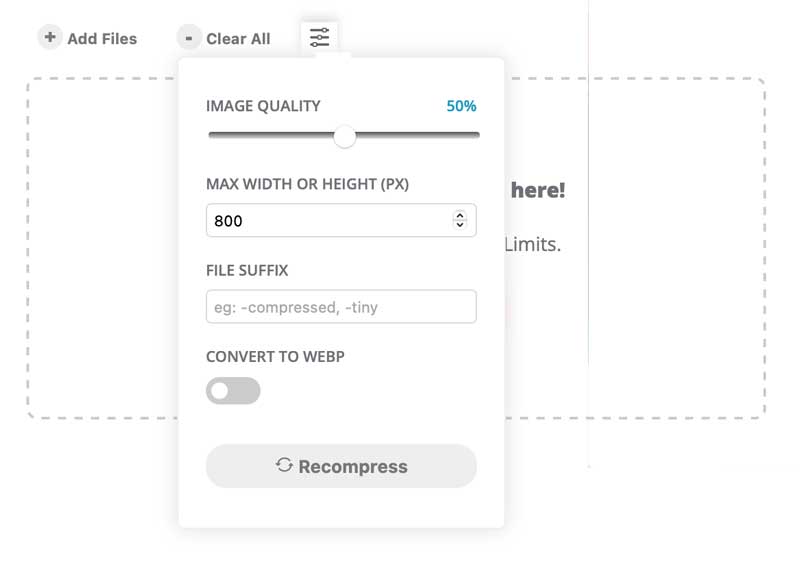
Now you can drag your image onto the screen, and the compression will start. When it’s done, download your image and give it a good file name.
Upload your featured image
Now you’re ready to add your featured image to your blog post. On the right hand side of the screen, go to the featured image heading and expand it if it’s not already open.

Click “Set featured image.” Then you can just drag your image onto the screen that appears. Then click the blue button in the bottom right corner that says, “Set featured image.”
Set a category (or more) for your post
On the right hand side of the screen, open the “Categories” section and choose at least one category for your post.
Schedule or publish your post
The final step is to publish your post or schedule it to be published at a later date/time. At the top right of the screen is a blue “Publish” button. If your article is ready for the world, you can click that button now! If you want it to be published at a later date, you’ll need to take one more step.
See this area:
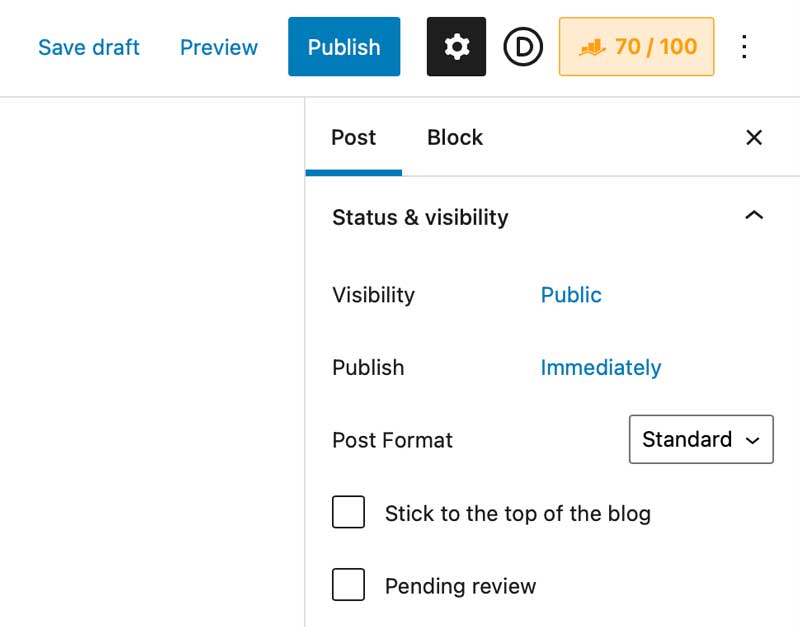
Do you see where it says “Publish” and next to it in blue it says, “Immediately”? Click the word Immediately. It will open up a calendar. You can choose your publish date and time there. Then the blue “Publish” button at the top of the screen will change to say, “Schedule.”
That’s it! You’ve written your blog post! It looks like a lot of steps, but once you do it once or twice, it will become a simple process. And now you know how to write a blog post in WordPress.
